


Craving a soft, chocolate-coated snack cake with a gooey marshmallow center? You’re not alone. Choco pies have earned their spot as one of the most beloved treats worldwide—think of them as a cross between a cake and a cookie, dipped in chocolate and stuffed with marshmallow. In this article, we’re breaking down how to make choco pie from scratch with step-by-step tips, equipment suggestions, and mouthwatering variations.
From homemade cake layers to a silky marshmallow filling and glossy chocolate shell, this guide walks you through the full process so you can recreate this nostalgic dessert in your kitchen. Whether you’re baking for kids, gifting treats, or just want a fun weekend project, your homemade choco pies will be softer, richer, and more satisfying than anything store-bought.
Check out our easy dessert ideas like this homemade Oreo cake recipe if you’re into DIY chocolate goodness.
Let’s get started!
Table of Contents
Introduction to Choco Pie
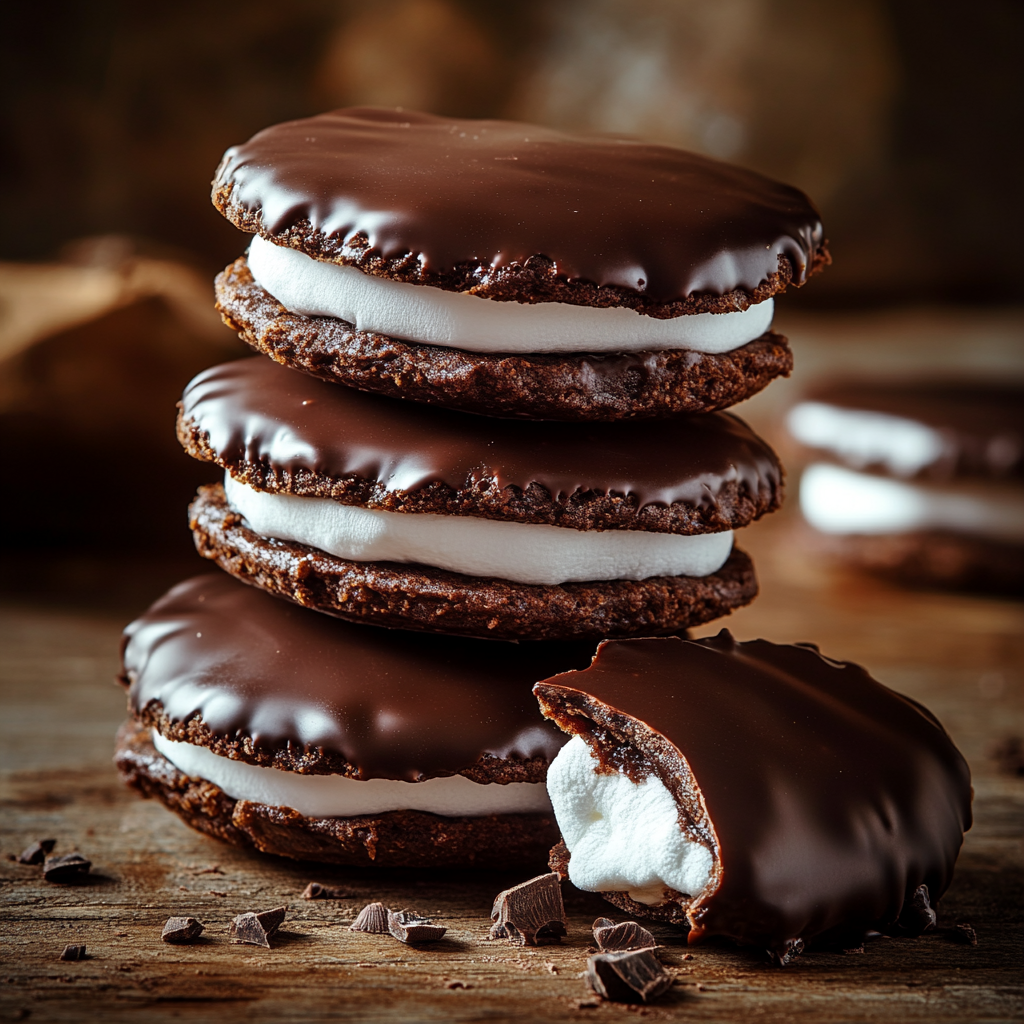
What Is a Choco Pie?
A choco pie is a sweet sandwich-style snack composed of two soft cake layers with a marshmallow filling in between, fully coated in chocolate. It’s often described as a dessert cousin of the American MoonPie, but it has evolved globally with unique flavors and variations.
Originally gaining traction in South Korea through brands like Orion and Lotte, choco pies have become a pantry staple across Asia, and now increasingly in the U.S. too.
Choco pies typically come in snack size, making them a perfect lunchbox dessert or after-school treat. But the best part? Making your own at home opens up a world of flavor combinations and freshness that pre-packaged ones just can’t match.
Origin and Popularity of Choco Pie Around the World
Believe it or not, the concept of the choco pie dates back to the early 20th century. Inspired by Southern-style marshmallow-filled MoonPies in the U.S., the Korean version became iconic thanks to Orion’s commercial debut in 1974.
From there, the snack turned into a symbol of comfort food across cultures—frequently appearing in care packages, travel snacks, and even as cultural gifts. In North Korea, choco pies were once so popular they were used as a form of currency among workers.
Here’s a quick snapshot of how choco pie popularity spread:
| Region | Popular Brand | Unique Twist |
|---|---|---|
| South Korea | Orion, Lotte | Fluffy texture, tea-time snack |
| Japan | Morinaga | Rich chocolate, fruity fillings |
| USA | MoonPie | Graham cracker & banana options |
| India | ITC, Parle | Coconut flavor, affordable snack |
| Vietnam | Orion | Smaller size, sweeter taste |
Now, with so many variations and nostalgic connections, it’s no surprise foodies everywhere want to learn how to make choco pie at home—with better ingredients and more love.
Ingredients Breakdown
Essential Ingredients for the Choco Pie Base
The foundation of any good choco pie is its soft, cakey shell. Unlike cookies or crunchy biscuits, choco pies are built with sponge-like layers that resemble a light vanilla cake or genoise.
Here’s what you’ll need for the pie base:
| Ingredient | Purpose | Substitution Option |
|---|---|---|
| All-purpose flour | Provides structure to the cake | Cake flour for softer texture |
| Granulated sugar | Sweetens the cake base | Coconut sugar for caramel note |
| Eggs | Adds moisture, binds the batter | Flaxseed eggs for vegan twist |
| Whole milk | Enriches the batter | Almond milk for dairy-free |
| Butter | Creates richness | Margarine or plant-based oils |
| Vanilla extract | Boosts flavor | Almond extract (optional swap) |
| Baking powder | Adds lift and softness | Baking soda + lemon juice |
| Salt | Balances the sweetness | Sea salt or kosher salt |
Pro Tip: To get that perfect cake-like texture, beat your eggs and sugar together for at least 3–5 minutes until pale and fluffy. This aeration is crucial for soft cake layers that hold the marshmallow center without crumbling.
So, when someone asks you how to make choco pie from scratch, the first answer is: start with the right cake base, not cookies.
Must-Have Components for the Marshmallow and Chocolate Coating
Once the cake layers are done, the next two steps define the choco pie experience: the marshmallow center and the shiny chocolate exterior. Let’s explore both.
For the Marshmallow Filling:
| Ingredient | Function | Notes |
|---|---|---|
| Corn syrup | Prevents crystallization, keeps it smooth | Can use honey as substitute |
| Granulated sugar | Sweetens and stabilizes the marshmallow | Don’t reduce or it’ll deflate |
| Gelatin | Gives the marshmallow its structure | Agar agar for vegan version |
| Water | Activates the gelatin and dissolves sugar | Use warm water for quick mix |
| Vanilla extract | Flavor enhancer | Optional lemon or peppermint |
Shortcut Option: You can use marshmallow fluff or mini marshmallows if you’re short on time. Just microwave and spoon between cake layers.
For the Chocolate Coating:
| Ingredient | Purpose | Best Tip |
|---|---|---|
| Dark chocolate | Main coating for classic choco pie | Use 60–70% cocoa for balance |
| Semi-sweet chips | Easier to melt and work with | Add a spoon of coconut oil |
| Coconut oil | Adds shine and smooth finish | Optional but recommended |
| Milk chocolate | For kids or sweeter version | Mix with dark for balance |
You can also dip them in white chocolate or ruby chocolate if you want colorful twists for themed parties.
Don’t miss our step-by-step chocolate coating guide for more help.
Tools and Equipment You’ll Need
Baking Essentials for Perfect Choco Pie
One of the secrets behind bakery-style choco pies? The right tools. Sure, you can improvise with basic items, but having the proper kitchen gear makes your baking smoother, faster, and yields professional-looking results. If you’re wondering how to make choco pie that’s bakery-grade at home, this section’s for you.
Here’s a checklist of baking tools you’ll need:
| Tool/Equipment | Why You Need It | Alternatives |
|---|---|---|
| Electric mixer | To whip cake batter and marshmallow filling | Hand whisk (manual option) |
| Mixing bowls | For separate stages: batter, marshmallow, coating | Glass or stainless steel bowls |
| Measuring cups/spoons | For accurate measurement of ingredients | Digital scale for precision |
| Cake pan or cookie molds | Shapes the pie rounds | Cookie cutter for round cut |
| Silicone spatula | For folding batter and scraping bowls clean | Wooden spoon |
| Parchment paper | Prevents sticking on baking tray | Silicone baking mat |
| Double boiler or microwave-safe bowl | For melting chocolate safely | Microwave with caution |
| Cooling rack | Helps chocolate set evenly post-coating | Plate with paper towels |
Pro Tip: A small ice cream scoop or piping bag helps to portion marshmallow filling evenly and keep things clean.
Pro Tips: Tools That Make the Process Easier
If you’re planning to make choco pies more than once (and trust us, you will), here are some “nice-to-have” gadgets that elevate the experience:
- Silicone dome molds: These are a game-changer for uniform choco pies with a neat rounded top.
- Candy thermometer: Helps get the sugar temperature just right when making marshmallow from scratch (between 240°F to 245°F for soft peaks).
- Chocolate dipping tool: Keeps fingers clean while evenly coating the pies in melted chocolate.
Not only do these gadgets improve results, they also make cleanup quicker—leaving you more time to eat your creations!
Looking for inspiration? Try these no-mess baking tools every home cook needs.
Preparing the Pie Base
Making the Soft and Fluffy Cake Layers
One of the biggest mistakes people make when learning how to make choco pie is treating the cake base like a cookie. But traditional choco pies are actually made with a light, sponge-like cake, almost like a whoopie pie or vanilla cupcake.
Here’s a step-by-step breakdown for perfect results:
Choco Pie Cake Base Recipe
Yields about 10–12 sandwich pies
Ingredients:
- 1 cup all-purpose flour
- ½ tsp baking powder
- ¼ tsp salt
- 2 eggs
- ½ cup granulated sugar
- ¼ cup whole milk
- 2 tbsp unsalted butter (melted)
- 1 tsp vanilla extract
Instructions:
- Preheat oven to 350°F (175°C). Line a baking sheet with parchment paper.
- Sift dry ingredients: In a small bowl, whisk together flour, baking powder, and salt.
- Beat eggs and sugar: In a larger bowl, use a hand or stand mixer to beat eggs and sugar until pale and fluffy (about 3–5 minutes). This creates the airy base.
- Add wet ingredients: Mix in melted butter, milk, and vanilla extract until smooth.
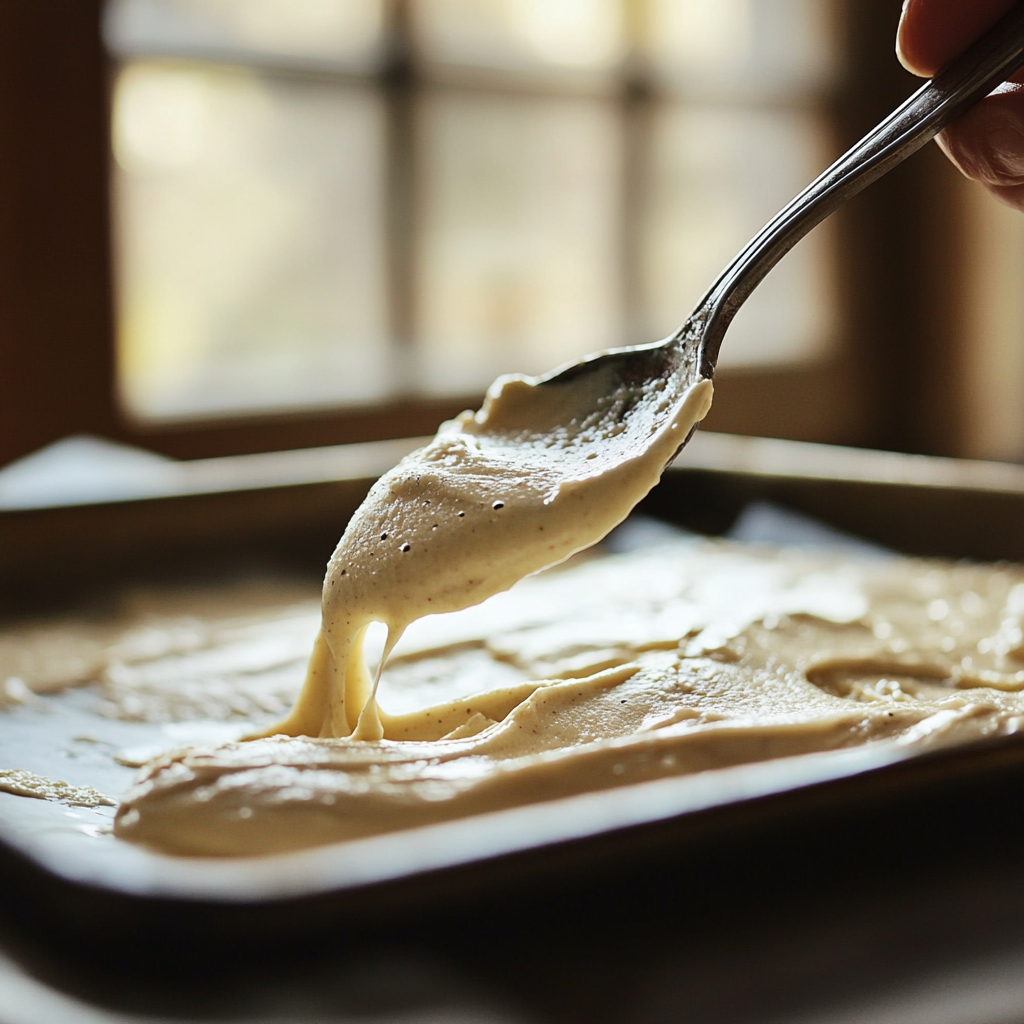
- Fold in dry ingredients: Gently fold the flour mix into the egg mixture using a spatula. Don’t overmix—stop as soon as it’s combined.
- Scoop onto tray: Spoon small dollops (about 1.5 tbsp) onto the parchment, leaving room for spreading.
- Bake: Bake for 8–10 minutes until the edges are lightly golden and the tops spring back when touched.
- Cool completely: Let them rest on a wire rack. They need to be cool before adding marshmallow.
Check out our easy whoopie pie-style cake batter tutorial for extra tips on batter consistency.
Tips to Achieve Even Thickness and Texture
Want every choco pie to look picture-perfect? Here are a few expert tips:
- Use a piping bag for even circles. It’s faster and cleaner than spooning batter.
- Don’t overbake the layers—they should be soft, not crisp.
- If they puff unevenly, press gently with the bottom of a glass while warm.
- For uniform size, trace circles on the backside of parchment as a guide.
| Baking Tip | Why It Helps |
|---|---|
| Don’t open the oven door early | Prevents deflation or uneven baking |
| Chill batter before piping | Reduces spreading for more uniform shapes |
| Use an ice cream scoop | Ensures same portion size for all layers |
Discover great ideas like our cookie shaping hacks for better bake control.

Creating the Marshmallow Filling
Homemade Marshmallow Recipe vs Store-Bought
The heart of any good choco pie is its gooey, cloud-like marshmallow center. While you can use marshmallow fluff from a jar or even microwave mini marshmallows for speed, there’s something magical about making your own. Plus, it tastes miles better—fresher, stretchier, and just sweet enough.
Let’s explore both options:
Option 1: Homemade Marshmallow Filling
If you’re serious about how to make choco pie like a pro, this is your route.
Ingredients:
- ½ cup granulated sugar
- ¼ cup water
- ¼ cup corn syrup
- 1 packet (about 2½ tsp) unflavored gelatin
- 2 tbsp water (for gelatin bloom)
- 1 tsp vanilla extract
- Pinch of salt
Instructions:
- Bloom gelatin: In a small bowl, mix gelatin with 2 tbsp water. Set aside to soften.
- Cook sugar syrup: In a saucepan, combine sugar, corn syrup, and ¼ cup water. Heat over medium until it reaches 240°F (soft-ball stage) on a candy thermometer.
- Mix & whip: Remove syrup from heat. Stir in the bloomed gelatin, then pour mixture into a stand mixer. Beat on high speed for 5–7 minutes until thick, glossy, and tripled in volume.
- Add vanilla & salt: Finish by blending in the vanilla extract and a pinch of salt for flavor balance.
Use immediately to pipe onto the cake layers.
Option 2: Store-Bought Alternatives
If you’re short on time, try:
- Marshmallow fluff – Spoonable, easy, but softer texture.
- Mini marshmallows – Microwave for 10 seconds, stir, and pipe quickly before it firms up.
Don’t miss our full marshmallow filling recipe breakdown to compare methods.
Assembling the Perfect Marshmallow Center
You’ve baked your soft cake rounds and whipped your marshmallow filling—now it’s time to build the pies.
Here’s how:
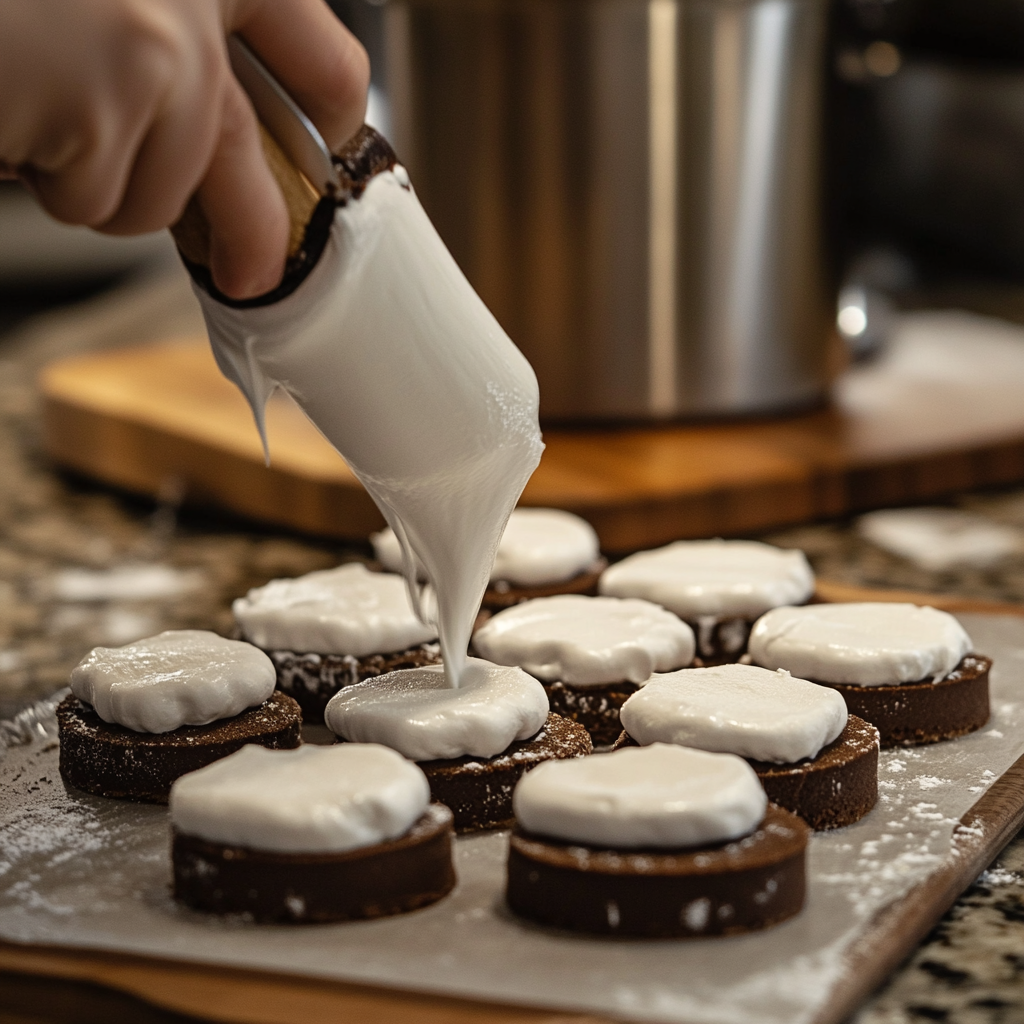
- Pair your cakes: Match similar-size circles together, bottom sides facing inward.
- Pipe the marshmallow: Using a piping bag or zip-top bag with the tip cut off, pipe a dollop (about 1 tbsp) of filling onto one side of each pair.
- Gently sandwich: Press the matching top over the filling lightly until it spreads to the edge. Don’t press too hard—you want a thick, visible marshmallow center.
Let them rest for 5–10 minutes so the marshmallow sets slightly before dipping in chocolate.
Check out our full assembly video on how to pipe perfect centers at danirecipes.com/how-to-fill-snack-cakes.
| Common Mistake | How to Avoid It |
|---|---|
| Marshmallow oozing out sides | Don’t overfill, and let it set before coating |
| Too firm to spread | Use while warm; re-whip if needed |
| Uneven distribution | Pipe in center and press gently |
Chocolate Coating Techniques
Types of Chocolate You Can Use
When figuring out how to make choco pie with that iconic smooth coating, your choice of chocolate matters. Not all chocolate melts the same way or sets with the same shine.
Here are your best options:
| Chocolate Type | Pros | Ideal Use |
|---|---|---|
| Dark chocolate (60-70%) | Deep flavor, less sugar | Classic choco pies |
| Semi-sweet chocolate chips | Easy to melt, mild flavor | Kid-friendly coating |
| Milk chocolate | Sweeter, softer finish | Dessert platters & holidays |
| Compound chocolate | No tempering needed, sets fast | Beginner-friendly coating |
| White chocolate | Fun for decorating and flavor variation | Strawberry/vanilla pies |
Pro Tip: For a shinier, snappier coating, choose couverture chocolate and temper it properly. But if that sounds too technical, adding a little coconut oil will do wonders.
How to Coat Choco Pies Smoothly and Evenly
This is where presentation meets patience. A smooth, even coating can turn a humble snack into a bakery-worthy treat.
Simple Chocolate Coating Method:
- Melt the chocolate: Use a double boiler or microwave (15-second intervals, stir each time) until smooth.
- Add coconut oil (optional): Stir in 1 tbsp per 1 cup chocolate to help with shine and flow.
- Prepare a wire rack: Place parchment or a tray beneath to catch excess chocolate.
- Dip each pie: Hold each pie with tongs or a fork and dip into melted chocolate. Use a spoon to coat the top if needed.
- Let excess drip: Gently shake to remove drips and place on the wire rack.
- Cool and set: Let pies sit at room temperature or chill in the fridge until firm.
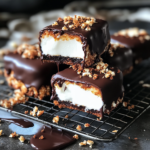
Bonus: Decorating Ideas
- Drizzle with white chocolate for a fancy touch
- Sprinkle crushed nuts, sea salt, or coconut before the coating sets
- Use colorful candy melts for holiday themes
Discover great ideas like our holiday chocolate decoration tips.
| Troubleshooting Issue | What to Do |
|---|---|
| Chocolate too thick | Add a bit more oil and reheat slightly |
| Coating too thin | Let it cool slightly before using |
| Chocolate not setting | Chill in fridge for 10–15 minutes |
| Air bubbles in coating | Tap fork gently on bowl rim when dipping |
Looking for inspiration? Try our chocolate dipping masterclass for expert-level results.

Baking vs No-Bake Choco Pie Versions
Traditional Baked Choco Pie Method
If you’re going the classic route, baking is the way to go. It creates the soft, sponge-like cake that sets homemade choco pies apart from store-bought snacks.
You already saw the basic cake batter in Part 4, but let’s dig deeper into why baking is worth the extra effort when learning how to make choco pie.
Why bake your choco pie cake rounds?
- Better texture: Light, fluffy, and spongy—not dry or chewy
- More control: Adjust sweetness, flavor, and shape
- Lasts longer: Baked cakes hold up better during storage and coating
- Customizable: Infuse vanilla, orange zest, or cocoa into the batter
Check out our baking tips for soft snack cakes if you want bakery-style results every time.
Here’s how to ensure your baked version is a winner:
| Step | Key Tip |
|---|---|
| Use room-temp ingredients | Helps everything mix evenly |
| Bake at the right temp | 350°F is the sweet spot—no cracked tops or dryness |
| Avoid overmixing the batter | Fold gently to keep the batter light |
| Cool before filling | Prevents the marshmallow from melting |
No-Bake Choco Pie Alternatives for Quick Preparation
Pressed for time? No oven? You can still make no-bake choco pie versions that taste amazing and come together in under 30 minutes.
Here are some fast alternatives:
- Graham cracker or digestive biscuit base – Use as the outer layers instead of cake.
- Marshmallow fluff – No whipping or thermometers required.
- Microwave chocolate coating – Skip tempering and dip quick!
Quick No-Bake Choco Pie Idea
- Lay out 2 digestive cookies
- Spread marshmallow fluff on one
- Sandwich together
- Dip in melted chocolate
- Chill for 10–15 minutes
Done. Sweet. Simple. Totally addictive.
| Comparison | Baked Version | No-Bake Version |
|---|---|---|
| Texture | Soft, sponge-like | Crunchier, cookie-style |
| Prep time | ~1 hour | 20–30 minutes |
| Shelf life | Longer (up to a week) | Shorter (1–2 days max) |
| Best for | Gifting, holidays | Quick snack, kids’ treat |
Don’t miss our no-bake dessert roundup for even more inspiration.
Storage and Shelf Life
How to Store Homemade Choco Pies Properly
After investing all that love into learning how to make choco pie, the last thing you want is soggy cakes or stale marshmallow centers. The good news? With the right storage, your choco pies can taste bakery-fresh for days.
Room Temperature Storage
- Duration: 1–2 days
- Best method: Place in an airtight container lined with parchment paper to prevent sticking
- Ideal spot: Cool, dry area—avoid direct sunlight or heat sources
Pro Tip: Layer the choco pies with parchment paper in between so the chocolate doesn’t smudge or melt.
Refrigerated Storage
- Duration: Up to 5–7 days
- Method: Store in a sealed container or wrap each pie individually with plastic wrap
- Note: Let them sit at room temp for 10 minutes before serving for the best texture
Check out our guide on keeping desserts moist and fresh.
| Storage Type | Duration | Tips |
|---|---|---|
| Room Temp | 1–2 days | Use parchment-lined airtight containers |
| Fridge | 5–7 days | Individually wrap for best results |
| Freezer | 1–2 months | Wrap tightly and label with date |
Freezing and Reheating Tips
Homemade choco pies freeze very well, making them a great prep-ahead dessert. Whether you’re meal prepping for the holidays or just made a double batch, here’s how to do it:
To Freeze:
- Let choco pies cool and chocolate fully harden.
- Wrap each pie tightly in plastic wrap.
- Place in a zip-top freezer bag or airtight container.
- Label with date. Freeze up to 2 months.
To Reheat/Serve:
- Room temp thawing: Place on the counter for 1 hour before serving
- Quick defrost: Microwave unwrapped on LOW for 10–15 seconds to soften
- Frozen snack: Eat directly from the freezer—it’s like a choco pie popsicle!
Discover more freezing hacks in our make-ahead dessert storage guide.
| Mistake to Avoid | Solution |
|---|---|
| Freezer burn or dryness | Use airtight wrapping and avoid air gaps |
| Chocolate cracking on thaw | Thaw at room temp, not in microwave |
| Marshmallow hardening | Keep pies sealed well to retain softness |
Creative Choco Pie Variations
Vegan, Gluten-Free, and Flavor Twists
If you’ve ever asked “how to make choco pie that everyone can enjoy?”—this is your go-to guide. From dietary preferences to exciting flavors, these custom versions are just as tasty as the original.
Vegan Choco Pie
You don’t need eggs or dairy to enjoy the same soft, gooey, chocolatey treat.
Swaps to try:
- Eggs → 1 tbsp ground flax + 3 tbsp water (per egg)
- Butter → Plant-based margarine or coconut oil
- Milk → Almond, oat, or soy milk
- Marshmallow → Use vegan marshmallow or agar-agar-based fluff
- Chocolate → Use certified dairy-free chocolate chips
Discover great ideas like our vegan baking swaps guide.
Gluten-Free Choco Pie
For a celiac-safe version, follow these tips:
- Flour: Use a 1:1 gluten-free flour blend (with xanthan gum) for your cake batter
- Cookies: You can also use gluten-free digestive biscuits for a no-bake version
- Cross-contamination: Always clean your tools if switching between versions
Looking for inspiration? Try this gluten-free snack cake tutorial.
Fun Flavor Variations
Let’s face it—once you know the basics of how to make choco pie, the possibilities are endless. Here are some flavor ideas to explore:
| Flavor Twist | How to Make It |
|---|---|
| Mint Chocolate | Add peppermint extract to marshmallow or chocolate |
| Peanut Butter | Mix peanut butter into marshmallow filling |
| S’mores Pie | Use graham cracker base, torch the marshmallow |
| Coffee Choco Pie | Add espresso powder to cake batter |
| Strawberry Cream | Add jam in center with marshmallow, coat in white choc |
| Holiday Spice | Cinnamon, nutmeg, and cloves in the cake batter |
Don’t miss our full collection of seasonal choco pie ideas.
| Occasion | Creative Idea |
|---|---|
| Kids’ Party | Use rainbow sprinkles before chocolate sets |
| Valentine’s Day | Dip in white chocolate and decorate with hearts |
| Halloween | Orange food coloring + spooky candy eyes |
| Christmas | Peppermint marshmallow + crushed candy cane |
These variations let you personalize your choco pies for any audience or event. And once you try them, you’ll never want to go back to the plain boxed version again.
Frequently Asked Questions (FAQs)
Can I use marshmallow fluff instead of homemade filling?
Absolutely. While homemade marshmallow gives the best texture and flavor, marshmallow fluff is a great shortcut if you’re short on time. Just spread a generous dollop between the cake layers, press gently, and move straight to the chocolate dipping. For firmer pies, refrigerate the assembled pies for 10–15 minutes before coating.
How long do homemade choco pies last?
Stored properly, homemade choco pies last:
At room temperature: 1–2 days
In the fridge: Up to 1 week
In the freezer: 1–2 months
To keep them soft and fresh, wrap them individually and store in an airtight container. Always thaw at room temp before serving for the best texture.
Can I make choco pies in advance?
Yes, and you should! Choco pies actually taste better the next day when the flavors meld. You can prepare all parts—cake, filling, and coating—a day or two ahead. Simply assemble and coat them the day you plan to serve for the freshest look and texture.
What chocolate is best for coating?
For the classic look and taste, use dark or semi-sweet chocolate (60–70% cocoa). It melts well, sets beautifully, and balances the sweetness of the marshmallow. You can also add a little coconut oil for shine. Milk and white chocolate work great for fun twists, especially for kids’ versions.
Are there vegan alternatives for choco pie?
Yes. You can make fully vegan choco pies by swapping:
Eggs → Flax eggs
Butter → Vegan margarine
Milk → Plant-based milk
Gelatin → Agar-agar
Chocolate → Dairy-free brands
There are also vegan marshmallows available that melt and stretch beautifully.
Why is my choco pie soggy after a day?
This usually happens when pies are stored while still warm or not fully coated. To avoid sogginess:
Let the cake cool completely before filling
Allow marshmallow to set
Fully coat each pie in chocolate to seal in freshness
Store in an airtight container in a cool, dry place
Conclusion
Now that you know exactly how to make choco pie from scratch, you’ve got the power to turn this nostalgic snack into a homemade masterpiece. From the pillowy cake rounds to the luscious marshmallow center and smooth chocolate shell, every step adds to the magic.
Whether you stick with the classic or branch out with vegan, gluten-free, or seasonal variations, choco pie is a recipe that adapts beautifully to your needs and creativity. It stores well, freezes even better, and makes a thoughtful gift or party treat.
So the next time a craving hits, skip the store-bought packs and bake your own batch—you’ll never look at snack cakes the same way again.
Looking for inspiration? Try our chocolate lava cake recipe for more melt-in-your-mouth dessert ideas.

Homemade Choco Pie with Marshmallow Filling
Ingredients
- For the Cake Base:
- 1 cup all-purpose flour
- ½ tsp baking powder
- ¼ tsp salt
- 2 large eggs
- ½ cup granulated sugar
- ¼ cup whole milk
- 2 tbsp unsalted butter melted
- 1 tsp vanilla extract
- For the Marshmallow Filling:
- ½ cup granulated sugar
- ¼ cup water
- ¼ cup corn syrup
- 1 packet 2½ tsp unflavored gelatin
- 2 tbsp water for blooming gelatin
- 1 tsp vanilla extract
- Pinch of salt
- For the Chocolate Coating:
- 1½ cups dark or semi-sweet chocolate chips
- 1 tbsp coconut oil optional, for shine and smoothness
Instructions
- Preheat oven to 350°F (175°C) and line a baking sheet with parchment paper.
- Prepare cake batter: In a bowl, whisk flour, baking powder, and salt. In a separate bowl, beat eggs and sugar until pale and fluffy (3–5 minutes). Add melted butter, milk, and vanilla; stir to combine.
- Fold in dry ingredients gently with a spatula until just combined. Avoid overmixing.
- Scoop batter onto the baking sheet (1.5 tbsp rounds), spacing them apart. Bake for 8–10 minutes or until lightly golden and springy to the touch.
- Cool cakes completely on a wire rack before filling.
- Make the marshmallow filling: Bloom gelatin in 2 tbsp water. In a saucepan, heat sugar, corn syrup, and water to 240°F (soft-ball stage). Remove from heat and stir in gelatin. Beat in a mixer on high for 5–7 minutes until glossy and thick. Add vanilla and salt.
- Pipe marshmallow filling onto the bottom of half the cake rounds. Gently press the remaining rounds on top to form sandwiches.
- Melt the chocolate coating using a double boiler or microwave. Stir in coconut oil if desired.
- Dip each choco pie into the chocolate, letting the excess drip off. Place on a parchment-lined rack to set.
- Let cool completely at room temperature or chill in the fridge until chocolate is firm.